
Running a timer
Start a timer from any task, run a workspace-only timer, and edit entries to see what was completed during the logged window.
Overview
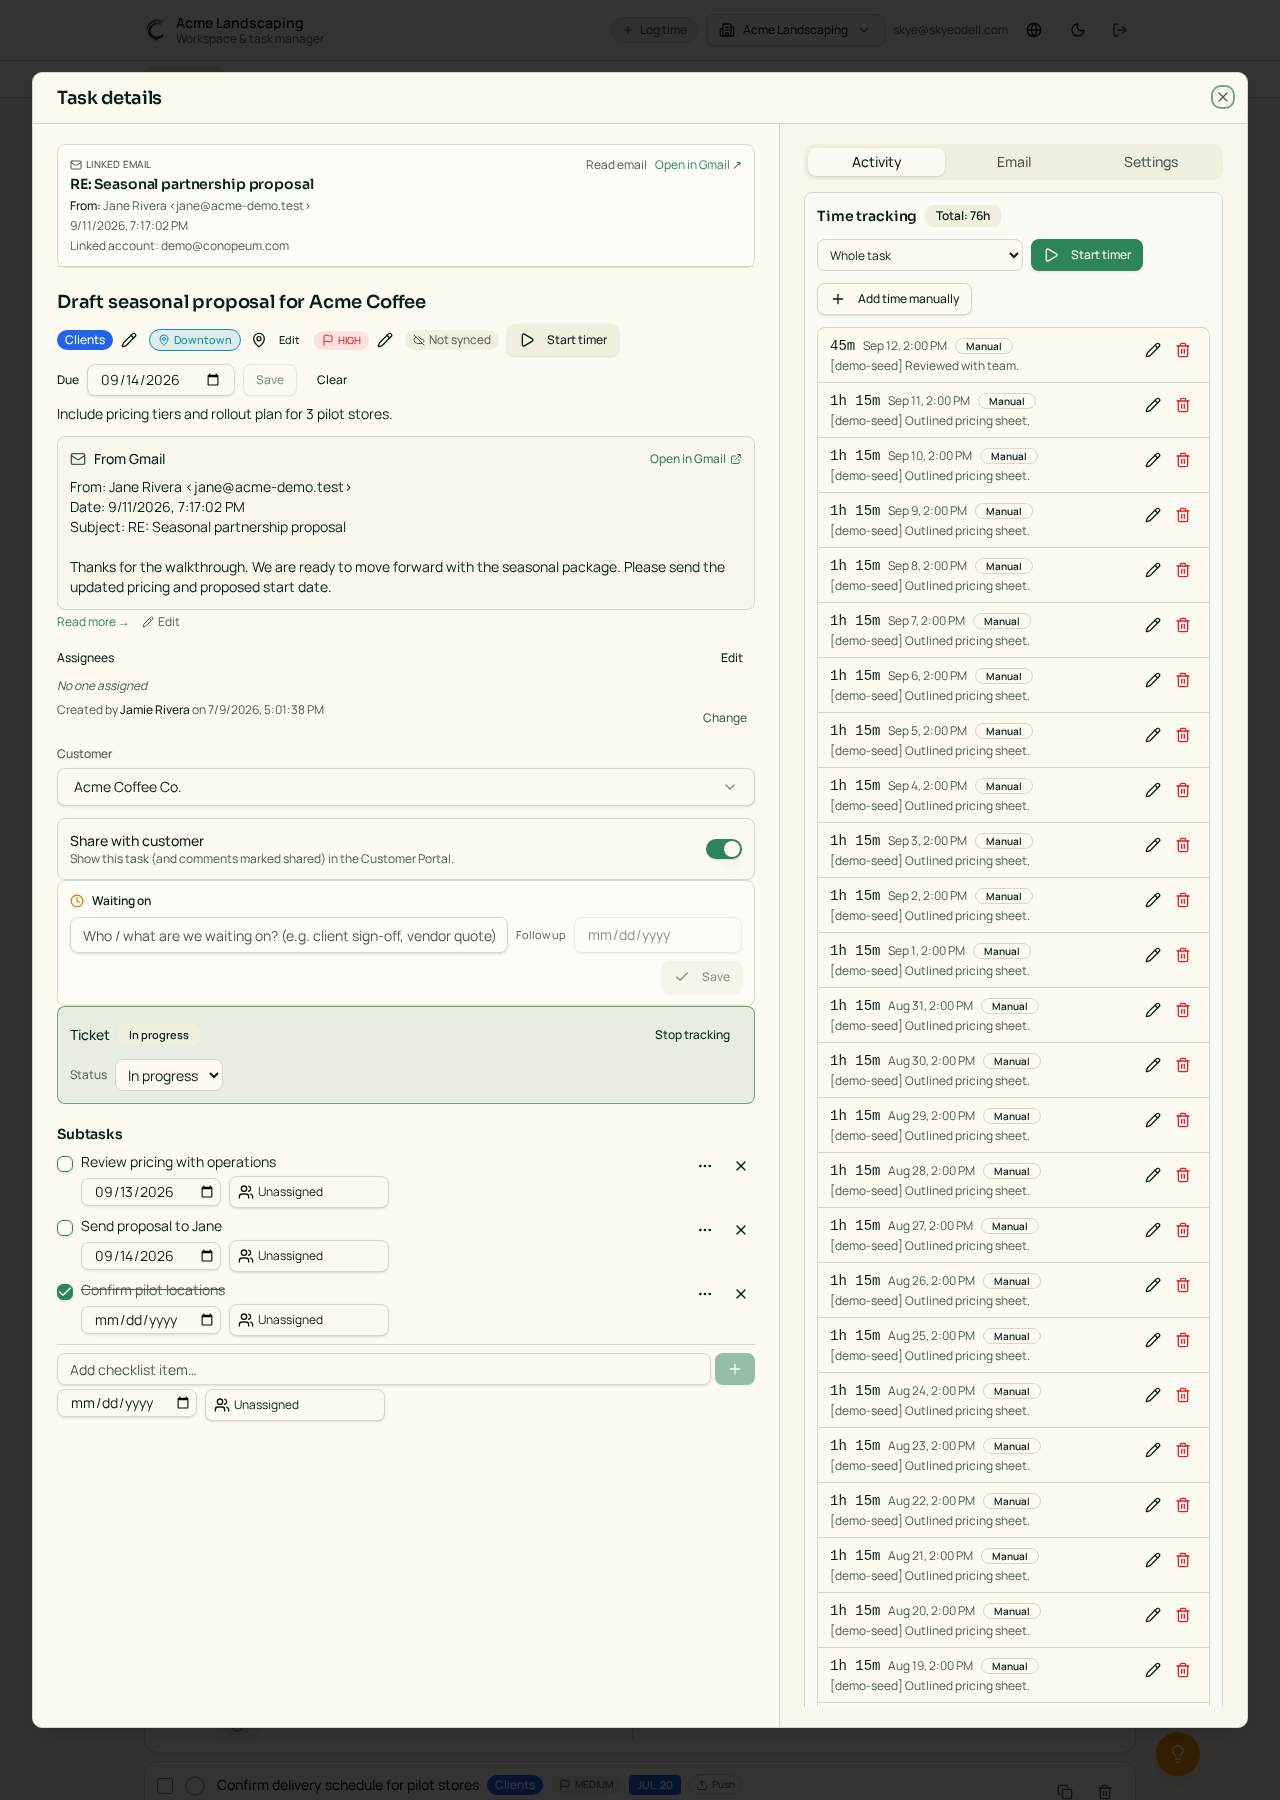
Every task in Conopeum has a built-in timer. Start it, work, stop it, the entry lands on your Timesheet and syncs to Plutio or Avaza (coming soon).
You can also run a workspace-only timer for work that isn't tied to one specific task.
Start a timer from a task
Open a task and click Start timer in the Time tracking panel.
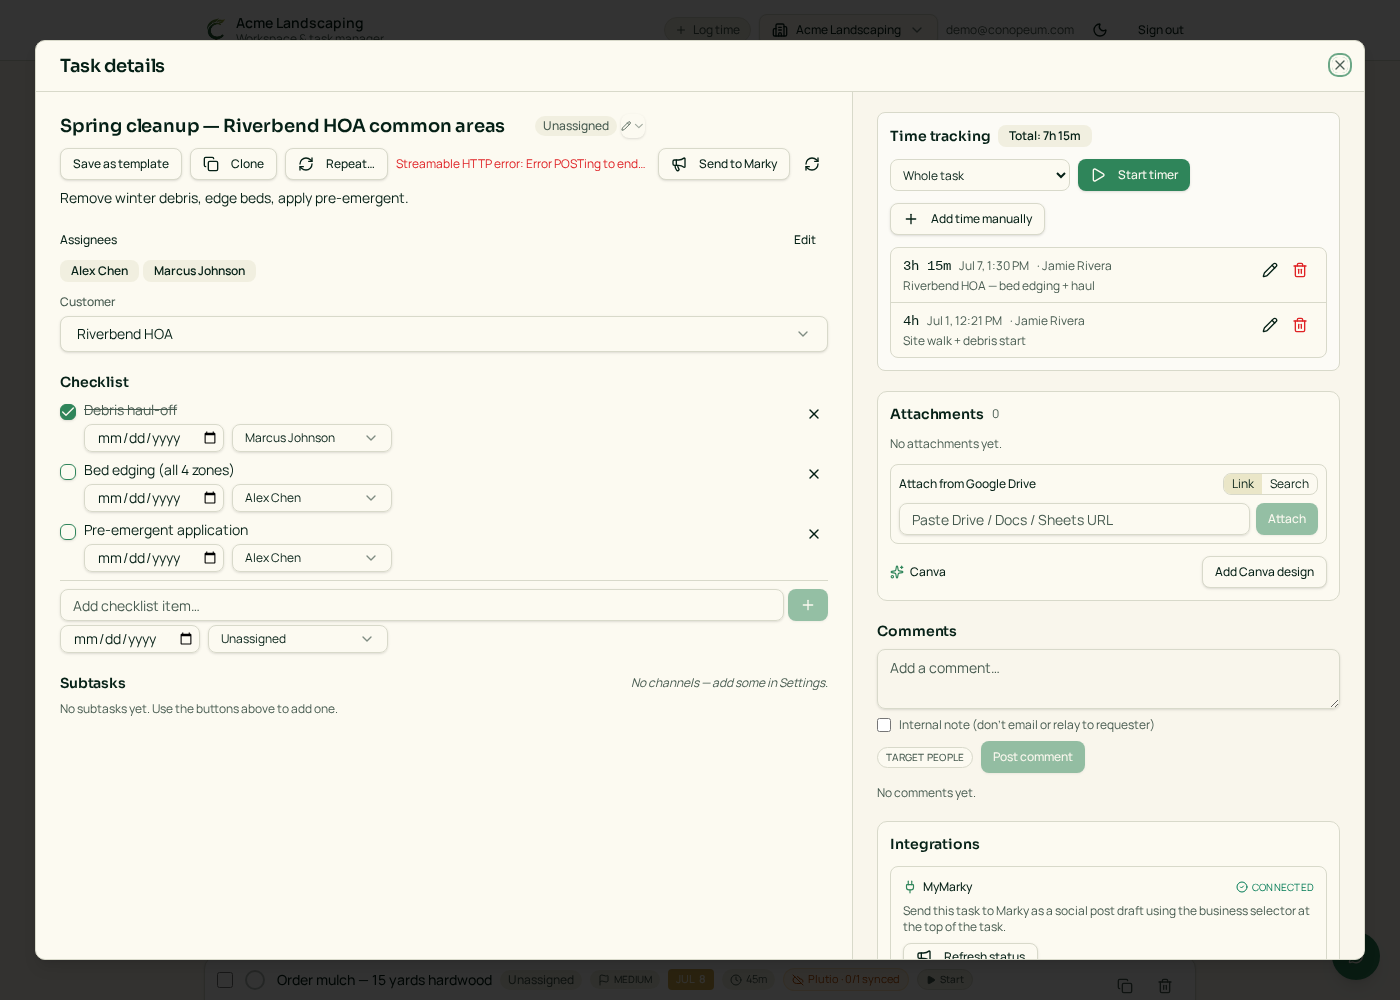
You can time the Whole task or a specific subtask: pick from the dropdown before starting. A running timer shows a live counter and a Stop button in the same panel.
Only one timer runs at a time. Starting a new one automatically stops the previous.
Workspace-only timer
Some workspaces are set to use a workspace-only timer. When this is enabled, the timer is tied to the workspace itself instead of a single task; useful for general work, admin, or anything that spans several tasks.
Owners and Managers can turn workspace-only timer mode on or off per workspace in the workspace settings.
When you stop a workspace-only timer, Conopeum shows you everything that was marked complete during that exact time window so you can quickly record what got done.
Log time manually
If you forgot to start the timer, click Add time manually on the same panel, or use Log time in the app header for a quick entry that isn't tied to an open task.
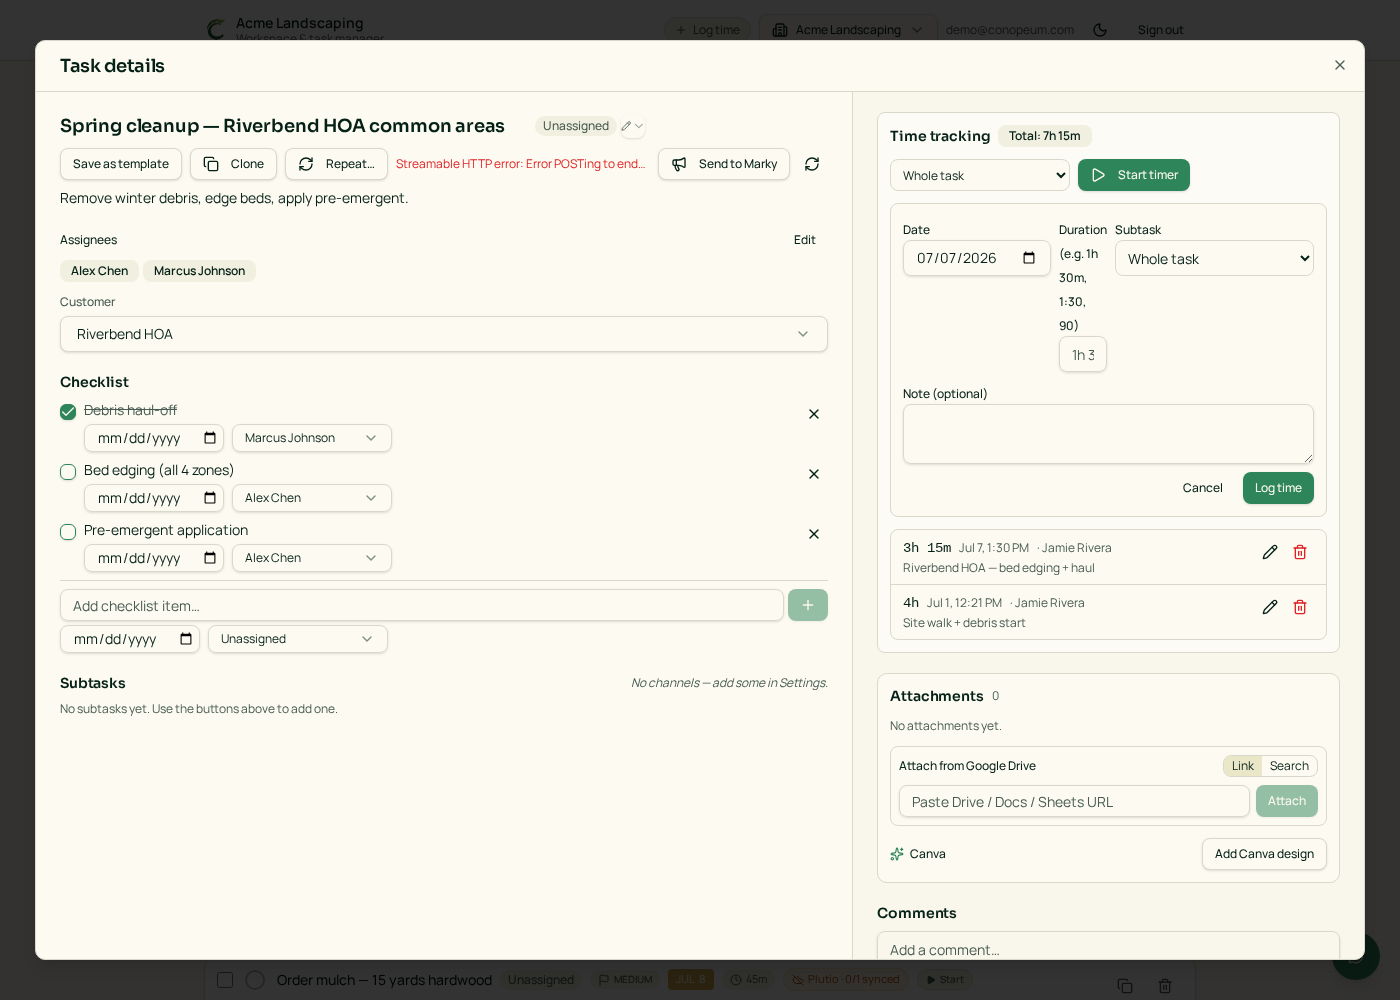
Enter the duration (e.g. 45m, 1h30), the date, and, for manual header entries, pick the task. Save, and it appears on your Timesheet.
Edit a time entry
Click any entry on the Timesheet to open the edit dialog. You can change the start and end times, duration, notes, and, for workspace-only entries, review the Completed during this window checklist.
The checklist shows items that were marked complete while the timer was running:
- Tasks marked done
- Subtasks marked done
If something was completed outside the timer window, it won't appear in the list, so the summary stays accurate to the time you're logging.
See all entries
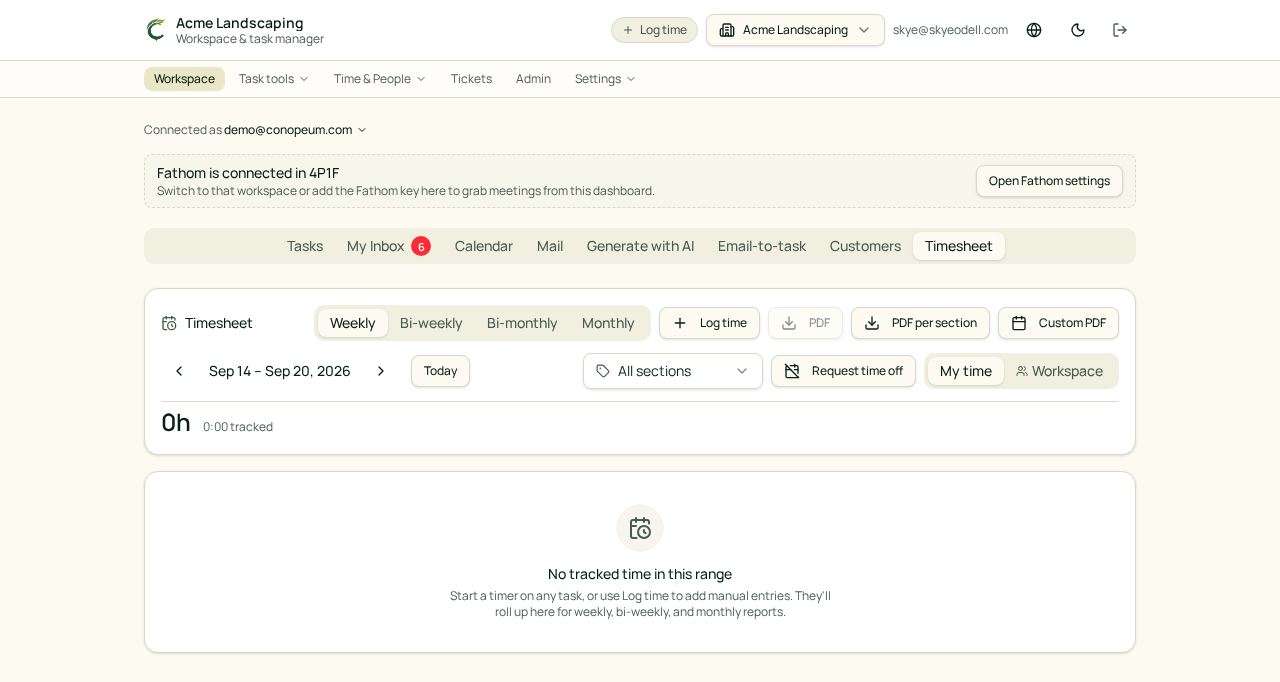
Open the Timesheet tab in /app.
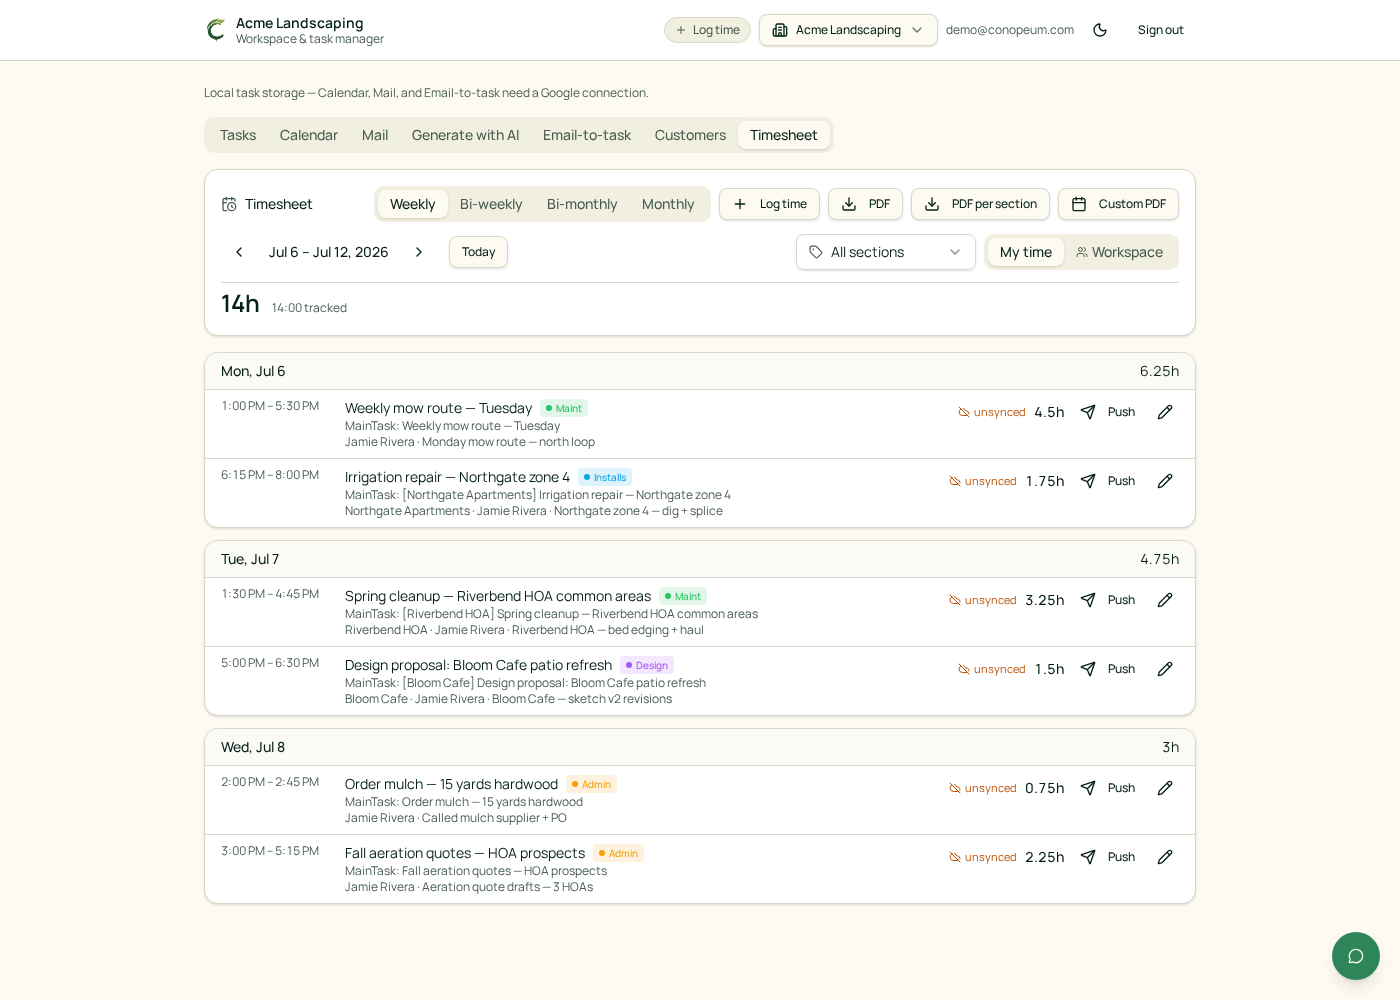
Use the period toggles at the top: Weekly, Bi-weekly, Bi-monthly, or Monthly, to choose the range, and the All sections dropdown to narrow entries to a specific section. Switch between My time and Workspace to see just your entries or everyone's. Managers and Owners can view the Workspace tab; Users and Contractors see their own entries.
Plutio and Avaza integration
If Plutio is connected, time entries sync two-way. Conopeum resolves time categories in a specific order: customer, then section, then workspace default. Support for pushing tasks and mirroring time entries per teammate to Avaza is coming soon.
Link a customer to Plutio so timers sync
A timer only pushes to Plutio when its task is tied to a customer that is linked to a Plutio project. Open the Customers tab, click the customer, and use the Plutio project panel:
To set the per-customer category that tags every hour billed here, click Edit on the customer and use the Plutio time category (override) field:
Step-by-step:
- Open the Customers tab in
/appand click the customer. - In the Plutio panel on the detail view, pick Link to existing project or Create new project from this customer.
- (Optional) Set a per-customer category override so every hour billed to this client tags the same Plutio time-tracking category.
- Save. Any task with this customer now shows Push to Plutio, and timers you run on those tasks sync out automatically. Plutio entries for the linked project also pull back into your Timesheet.
FAQ
- The link did not save: check the Plutio connection is active and the customer has an Organization name. The project list is empty if credentials are missing or expired.
- Creating a new project failed: use a unique Org name; if a Plutio project already exists with that name, choose Link to existing project instead.
- What syncs after linking?: tasks assigned to this customer show Push to Plutio, time entries push and pull two-way, and customer details (org name, email, contact name) stay in sync between Conopeum and the linked Plutio project/contact.
- How do I unlink?: clear the project in the Plutio panel or delete the customer. Already-pushed time entries remain in Plutio; new tasks stop offering the project.
Workspace admins must first connect Plutio in Settings: Integrations: Plutio. Full walkthrough: Plutio integration.
Troubleshooting
- The Start timer button is greyed out: an active timer is running on another task. Stop it first (from that task, or from the running-timer indicator in the header).
- My entry is not showing the correct category in Plutio: Conopeum checks for categories assigned to the customer first, then the section, then the workspace default.
- The workspace timer doesn't show a task dropdown: that workspace is in workspace-only timer mode. The time is logged against the workspace, and you can review completed items when you stop or edit the entry.