
Managing customers
Group tasks by customer and see everything in one place. Learn about auto-creation, ticket merging, and deduplication.
Overview
Customers are the people or organizations you do work for. Adding a customer lets you tag tasks, inboxes, and time entries so you can filter and report by client.
Auto-creation from email
Conopeum automatically creates customer profiles based on inbound email. When a new person contacts your team, a customer record is established using their email address. Email matching is trim and lowercase (case and whitespace insensitive) so duplicates do not slip in.
The Customers tab
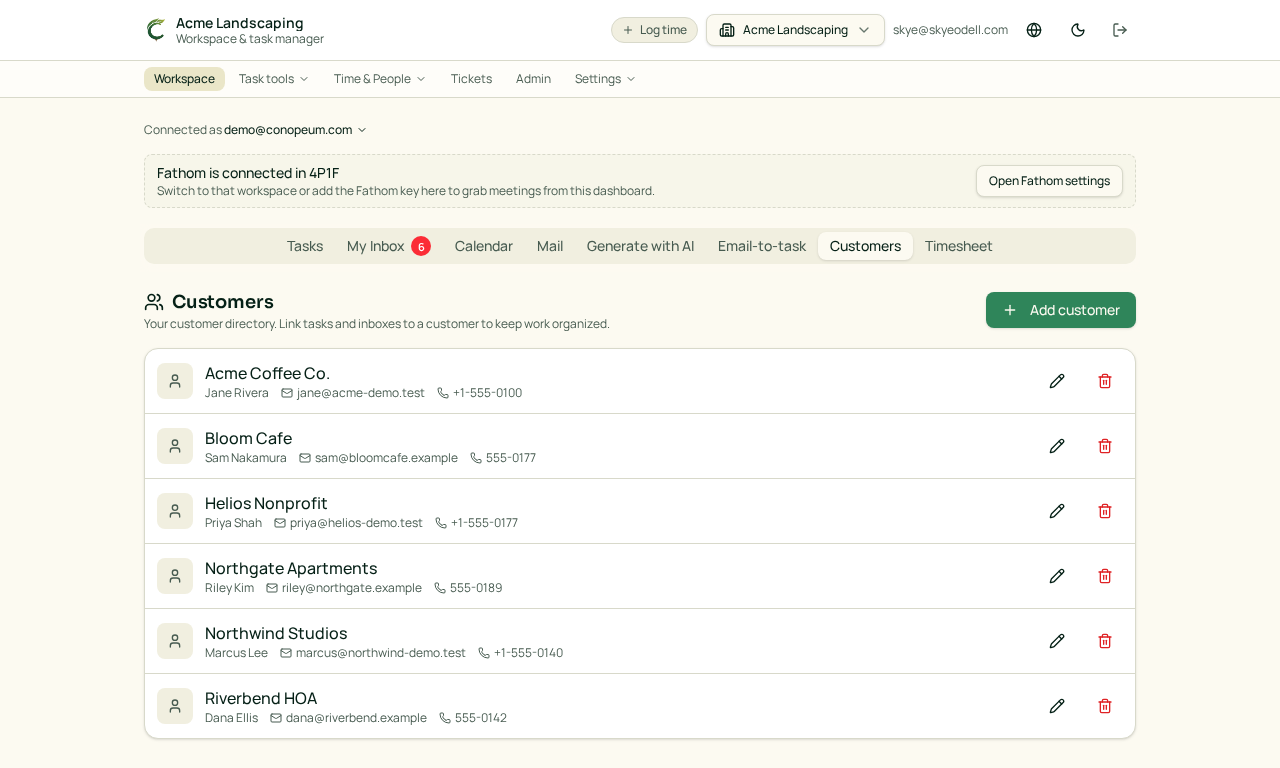
Open the Customers tab in /app.
Each row shows the customer name, primary contact, email, and phone. Click Add customer to create one manually.
Add a customer
Click Add customer and fill in:
- Name: required, shown in every picker
- Primary contact name, email, phone: optional but useful for quick outreach
- Section: the default section for tasks linked to this customer
Save, and the customer becomes selectable from the Customer dropdown on every task.
Email-based deduplication
When you create a customer with an email that already exists in the workspace, Conopeum won't make a duplicate. If a matching customer is found, missing fields like name, phone, or organization are backfilled from the new submission. A "matched existing customer" note surfaces in the Add-as-task dialog as a warning to ensure you know a match was made.
Link a task to a customer
In the task detail dialog, use the Customer picker under the title. Pick an existing customer or type a new name to create one on the fly. Filter the Tasks tab by customer to see everything for a client at once.
Ticket Merging
If the same customer sends two different email threads regarding the same issue, Conopeum supports ticket merging. You can merge both threads into a single task to keep your communication and history centralized.
Add a customer while creating a task from email
You don't have to open the task after the fact: the Add as task dialog has its own Customer (optional) picker. Pick an existing customer, or click the + button next to the picker to create one inline. If the source email has a recognizable sender, the name and email are pre-filled from the From: header.
Link an inbox to a customer
In Settings: Email-to-task, each inbox can be tied to a customer. Any email that lands in that inbox and is converted to a task inherits the customer link automatically.
Link a customer to Plutio
If your workspace has Plutio connected, each customer can be tied to a Plutio project. Every task attached to that customer inherits the link.
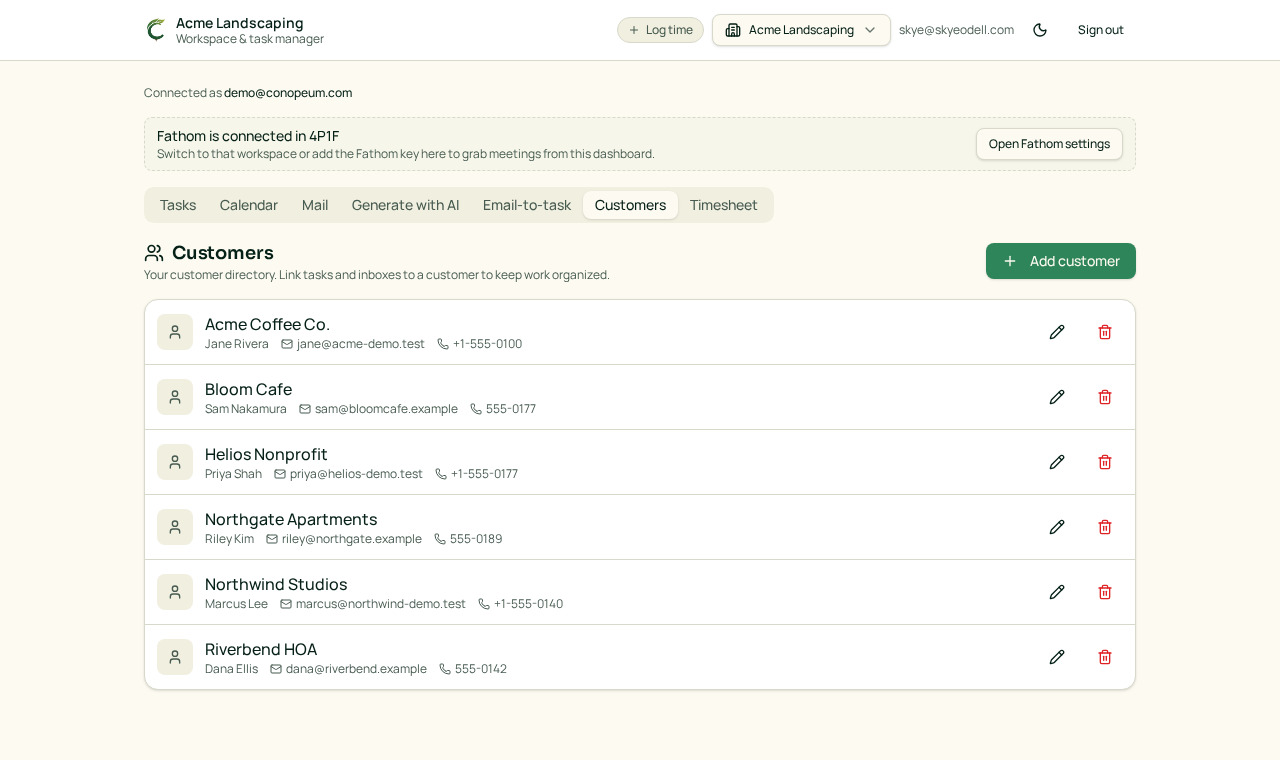
1. Open the Customers tab and click a customer row. The pencil is the quick-edit shortcut; clicking the row itself opens the full detail view where the Plutio panel lives.
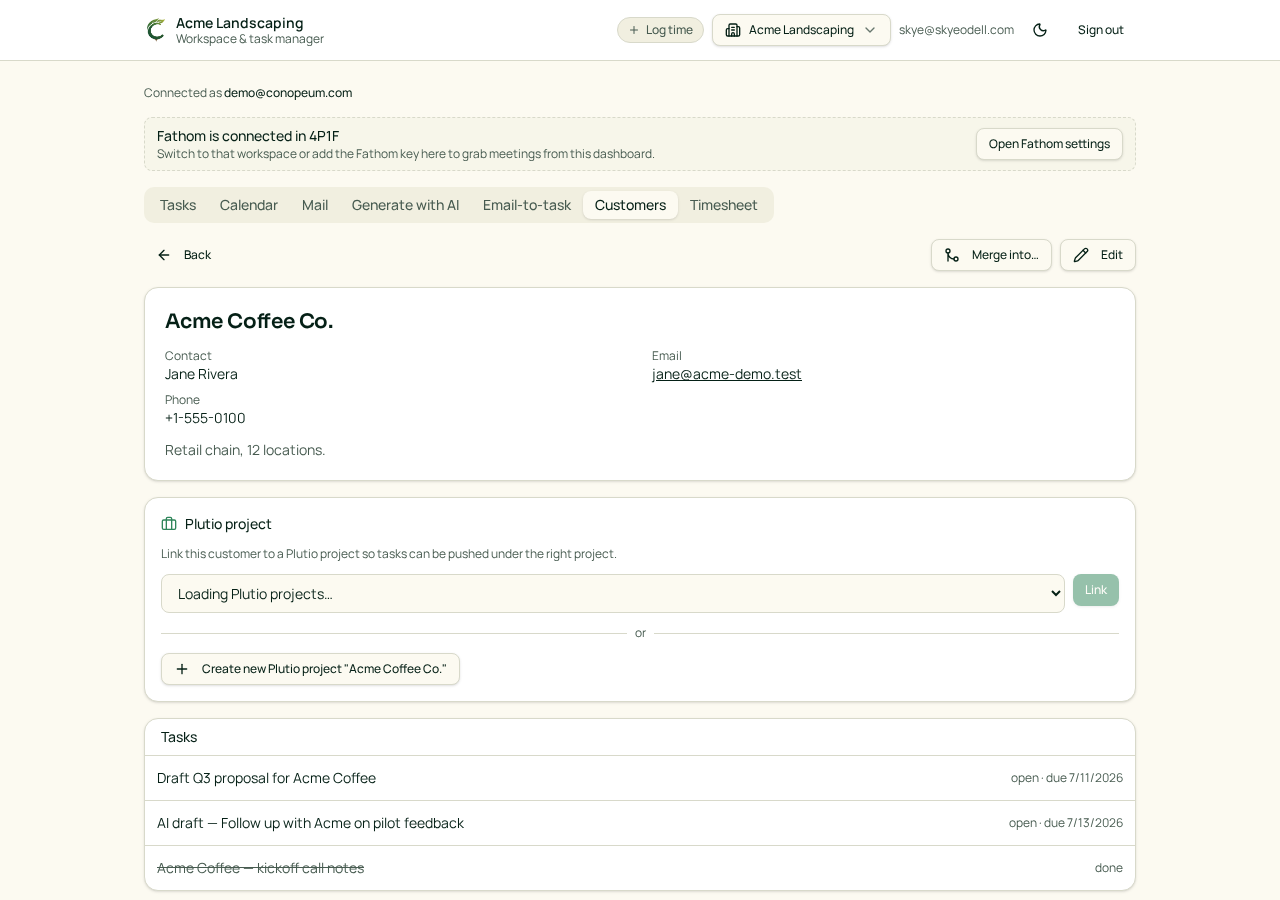
2. In the Plutio project panel, pick an existing project or create a new one. The dropdown shows every project in your connected Plutio workspace; the button below creates one named after the customer and links it in a single step.
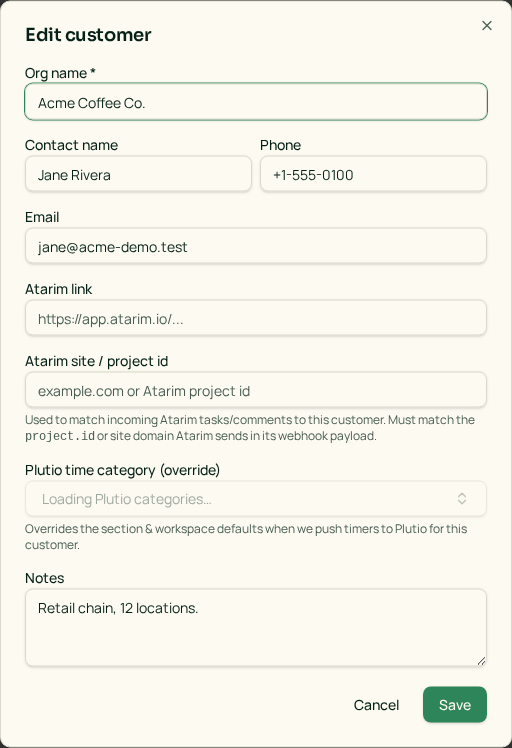
3. (Optional) Click Edit and set a per-customer time category. Fields that flow into Plutio: Org name → project title when you create a new one, Email and Contact name → Plutio contact record, Plutio time category (override) → the category tag on every timer pushed for this customer.
Once linked:
- Every task attached to the customer inherits the same Plutio project, so Push to Plutio on any task lands in the right place.
- Time entries sync in both directions between Conopeum and Plutio for that project.
- Customer details stay in sync two-way, so edits in either tool propagate.
- You can set a per-customer time-entry category override so every hour billed to that client tags the same Plutio category.
FAQ
- The link did not save: check the Plutio connection is active and the customer has an Organization name. The project list is empty if credentials are missing or expired.
- Creating a new project failed: use a unique Org name; if a Plutio project already exists with that name, choose Link to existing project instead.
- What syncs after linking?: tasks assigned to this customer show Push to Plutio, time entries push and pull two-way, and customer details (org name, email, contact name) stay in sync between Conopeum and the linked Plutio project/contact.
- How do I unlink?: clear the project in the Plutio panel or delete the customer. Already-pushed time entries remain in Plutio; new tasks stop offering the project.
For the full walkthrough — connecting credentials, pushing tasks, the category priority order, and troubleshooting — see Plutio integration.
Delete a customer
Click the trash icon on the customer row. Tasks that referenced them keep their history but lose the link; you can re-attach a different customer at any time.